Showing posts with label tutorial. Show all posts

Sunday, May 30, 2010

Block of Faith

I needed something to put on my flower cart on the porch that would elevate my lantern... so I came up with this idea. Using a 6x6 block of wood (that I took from my brother in law's scrap after building a deck), I created this:

DSC_0043

I was able to use my Cricut and vinyl to cut the word "faith" mulitple times. I then applied it to the block of wood so that it looked like this:

DSC_1074

I suppose you could go all the way around the block but, nah... that was too much trouble.

Using black spray paint, I spray painted over the letters and covered the block of wood. And it was at this point that I discovered that I stink at spray painting. But luckily, it didn't matter with this project. And I have my wonderful husband to do all the "serious" spray painting for me... whew. So, after it's spray painted, it looks like this: (this wasn't the final coat, but close to it... it didn't matter too much with this block b/c I was gonna distress it anyway.)

DSC_0040

Pull off the letters, sand a bit to distress it and that's it!

DSC_0043

I wish that I had stained the block first before applying the vinyl... I think that would have given it a more distressed look. Maybe I'll do that next time. I promise to show pictures of my porch soon. We've changed our mind and are going to stain the floor now. We have SO many gallons of stain that my daddy gave us and so we finally decided to go with it and stain it. So... you'll have to wait a bit longer. I know, I know. The suspense is killing you... :)

Head on over to Beneath My Heart for other great Do it Yourself projects!

Tuesday, May 11, 2010

Burp cloths

Oh, thank goodness for burp cloths! I can probably count on one hand the number of burp cloths I used with Ella. With Shep... well let's just say that I have about a dozen and we wash them quite regularly. He spits up like nobody's business! At least he's a happy spitter and it doesn't bother him at all. It's just annoying to always have that smell on him and us.
Luckily, before he was born, I found a great tutorial online about making burp cloths. For the life of me, I can't remember the site but if I find it or you know it please let me know. I'll link to it because this was something that I saw as inspiratation and I don't want anyone to think I stole it and made it my idea!!

I simply bought a pack of diapers. I bought Gerber prefold birdseye weave. They don't look the best (in that boutiquey kind of way) but they are ultra absorbent and I'm glad *now* that I bought these. I had no idea then how useful they would be! I also bought some cute ribbon, ric rac and double fold bias quilt binding. NOTE: I did NOT pre-wash mine and they have been just fine.

First, get the diaper. Choose your ribbon and cut 2 strips the length of the burp cloth. Starting at the top of the diaper, sew the ribbon onto the burp cloth. I try to keep the sewing machine in the center of the ribbon. Do this for both strips of ribbon.

Next, measure your quilt binding to the diaper and cut. Do this for the top and the bottom. Fold it over the diaper and sew. Do this for both ends. Zig Zag the stitch for that "extraness"! That's it!


I will definitely be giving these to new mommies in the future. I just hope they don't have a spitter-upper like I have!!

Head on over to Today's Creative Blog for more DIY ideas!

Monday, May 3, 2010

Place mat pillow

I found this great place mat at the Dollar Tree and decided it would make a great pillow. It's perfect for Shep's room. The great thing about this place mat is that it already had a backing so all I needed to do was unstitch a section, fill with stuffing and re-stitch the place mat. I went one step further and added Shep's name to it.


Materials
Cricut
place mat
fabric paint
freezer paper
sponge paint brush
iron

Using your cricut machine, choose your design. In this case, I wanted to personalize the pillow, so I did "Shep" using my SCAL software and the CAC One Seventy font. Place freezer paper shiny side down in your cricut machine. Set the cricut (pressure 4, blade 3 and speed3) and cut the design.
Place place mat on ironing board and place the cut out design onto the place mat shiny side down. It must be shiny side down so that the freezer paper will adhere to the fabric. Iron over the place mat for approximately 10 seconds to ensure all parts are adhered.
Take another piece of freezer paper and place on the inside of the place mat before painting. This will keep the paint from bleeding through.


Once that paper is in place, you are ready to paint. Using a sponge paintbrush, sponge the paint onto the place mat where it is cut out. I use a sort of pouncing method and NOT a stroking method. Once it is dry... that's it!! Fill with stuffing and restitch.


Tuesday, April 27, 2010

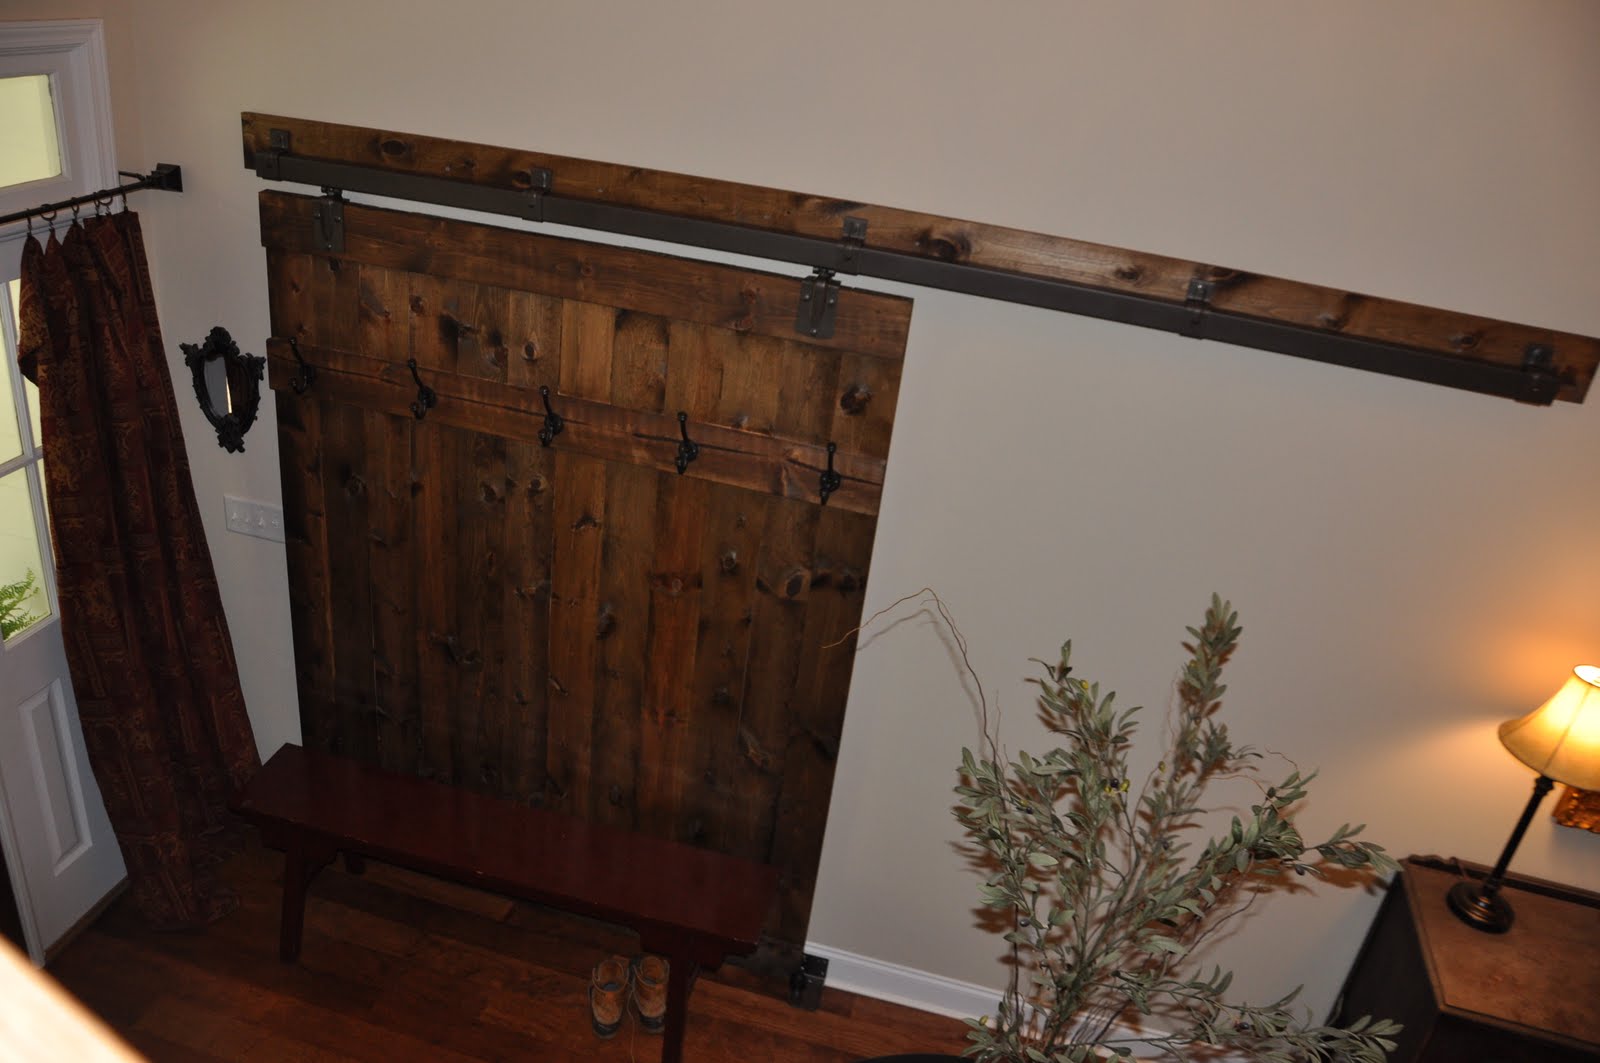
Barn Door

After finishing the nursery, Scott and I decided we wanted to move Ella's room downstairs so that we would have both kids close together. But where would we move her to? We only have 2 bedrooms downstairs and hers was upstairs (and HUGE too!). What we decided on finally (after going through virtually every scenario) was to move her into the study. Doing this posed a few problems though. One was closet space... the study has a built in book shelf instead of a closet. We are still working on that problem too! But the biggest problem was there would be no door to close for privacy. Option one would have been to close in the opening with sheet rock, paint, etc. I was a bit hesitant about doing this... I really wanted the kids to be able to have another exit option... In case of an emergency. No, I'm not paranoid. Just crazy like that.


Our solution? This COOL, incredible, sliding BARN door!!! We made it ourselves and are totally pleased with it... and it fits our style perfectly. It looks great from both sides... Ella's room is a "cowgirl" room so it worked out great!


Stay tuned for a tutorial on how you can make your own barn door!

Head on over to Beneath My Heart for more DIY projects... her blog is great!!


Wednesday, April 21, 2010

Another cricut idea...

Here is another cute and inexpensive idea for a baby shower gift. For this project, I purchased a 6x8 piece of white tile from Lowe's. I cannot remember exactly, but I believe it was less than $2.


Materials
6x8 tile
Vinyl lettering (I used the Cricut brand that I purchased from Walmart)
Cricut machine
Tulle ribbon
drill

I used my cricut machine to cut out the vinyl letters. In this case, the initials are 3 letter monogram style. I then had my sweet husband drill holes in the top of the tile so that I could run the ribbon through and the plaque can be hung on the wall.


Shared on:

Tuesday, April 20, 2010

Do you cricut?

I bought a cricut machine last year thinking I'd use it mainly for scrapbooking. Well, I've hardly used it for scrapbooking at all! I was on semi-bedrest for a week or so when I was pregnant with Shep and that's when I discovered VINYL with Cricut. O-H M-Y! I was in crafting heaven! I couldn't wait to try some of the vinyling techniques I had learned in blogland! So here is one of the first things I did. I bought this pig at Hobby Lobby (with a 40% off coupon, of course) and added the vinyl to this and voila!! Easy Peasy. I did buy Sure Cuts A Lot, which keeps me from buying all the cartridges used with the Cricut. With SCAL, you can cut out any font on your computer. That's what I did with the piggy bank. I used the Boingo font for the letter "A".


So, with my Cricut, I was able to turn a $5 piggy bank into a one of a kind gift. These make great gifts for baby showers!!